#
ReVanced CLI Initialize Guide (Windows)
In this guide, we are going to use ReVanced CLI on Windows to patch instead of manager.
#
1. Install Java Development Kit (JDK)
- Visit the download page of Azul JDK
- JDK versions 11, 17 and 20 are all compatible. Download the
.msiinstaller for the platform you need - Your computer is most likely to be 64-bit.
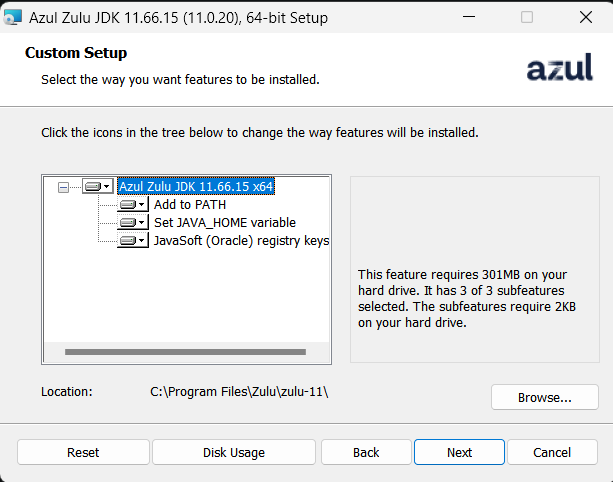
- Remember to check all the checkboxes, especially the JAVA_HOME one.
Remember to check the box for for adding JDK to PATH, set JAVA_HOME variable and register JavaSoft!
- Wait for it to finish installing
#
2. Get ReVanced related files

- Get the following required files
- ReVanced Patches, you need the
.jarfile. - ReVanced CLI, you need the
.jarfile. - ReVanced Integrations, you need the
.apkfile.
- ReVanced Patches, you need the
- Put all of the files in a folder in
Downloads. Lets call itrevancedfor now
#
3. Get the APK you wanted to patch
- If you want YouTube APK, get the YouTube apk link at step by step guide
- If you want other APKs, find the supported version at versions.md
- Put the APK you downloaded in the same folder with the 3 files you downloaded just now.
- Rename the APK to a shorter name, preferably without spaces and special symbols (dots are fine)
Make sure you downloaded the full APK, not .apks/.apkm/split apks
#
4. Sanity checks
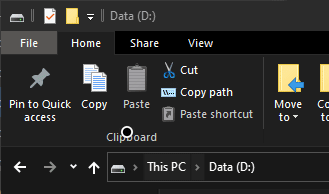
- Go to the
revancedfolder you made just now - Right-click/Shift-right-click the empty space and click "Open Terminal"/"Open Powershell"
- If you can't find the button, click the file button in the ribbon
- Type
dirand hit enter, you should see the 4 files you downloaded just now - Type
java -versionand hit enter. The version of JDK you installed in Part 1 should appear. - Don't close the terminal window, continue to the next section
#
5. Continue
This section has been completed. Go back to the main cli guide.